How to use Voca
Mixing vocals can be challenging because they are expressive and dynamic, varying in volume across phrases, between words, and within words. To maintain consistent audibility while preserving expressivity, Voca offers dynamic control across different timescales. This involves multiple stages of processing, each stage improving the sound of the next.

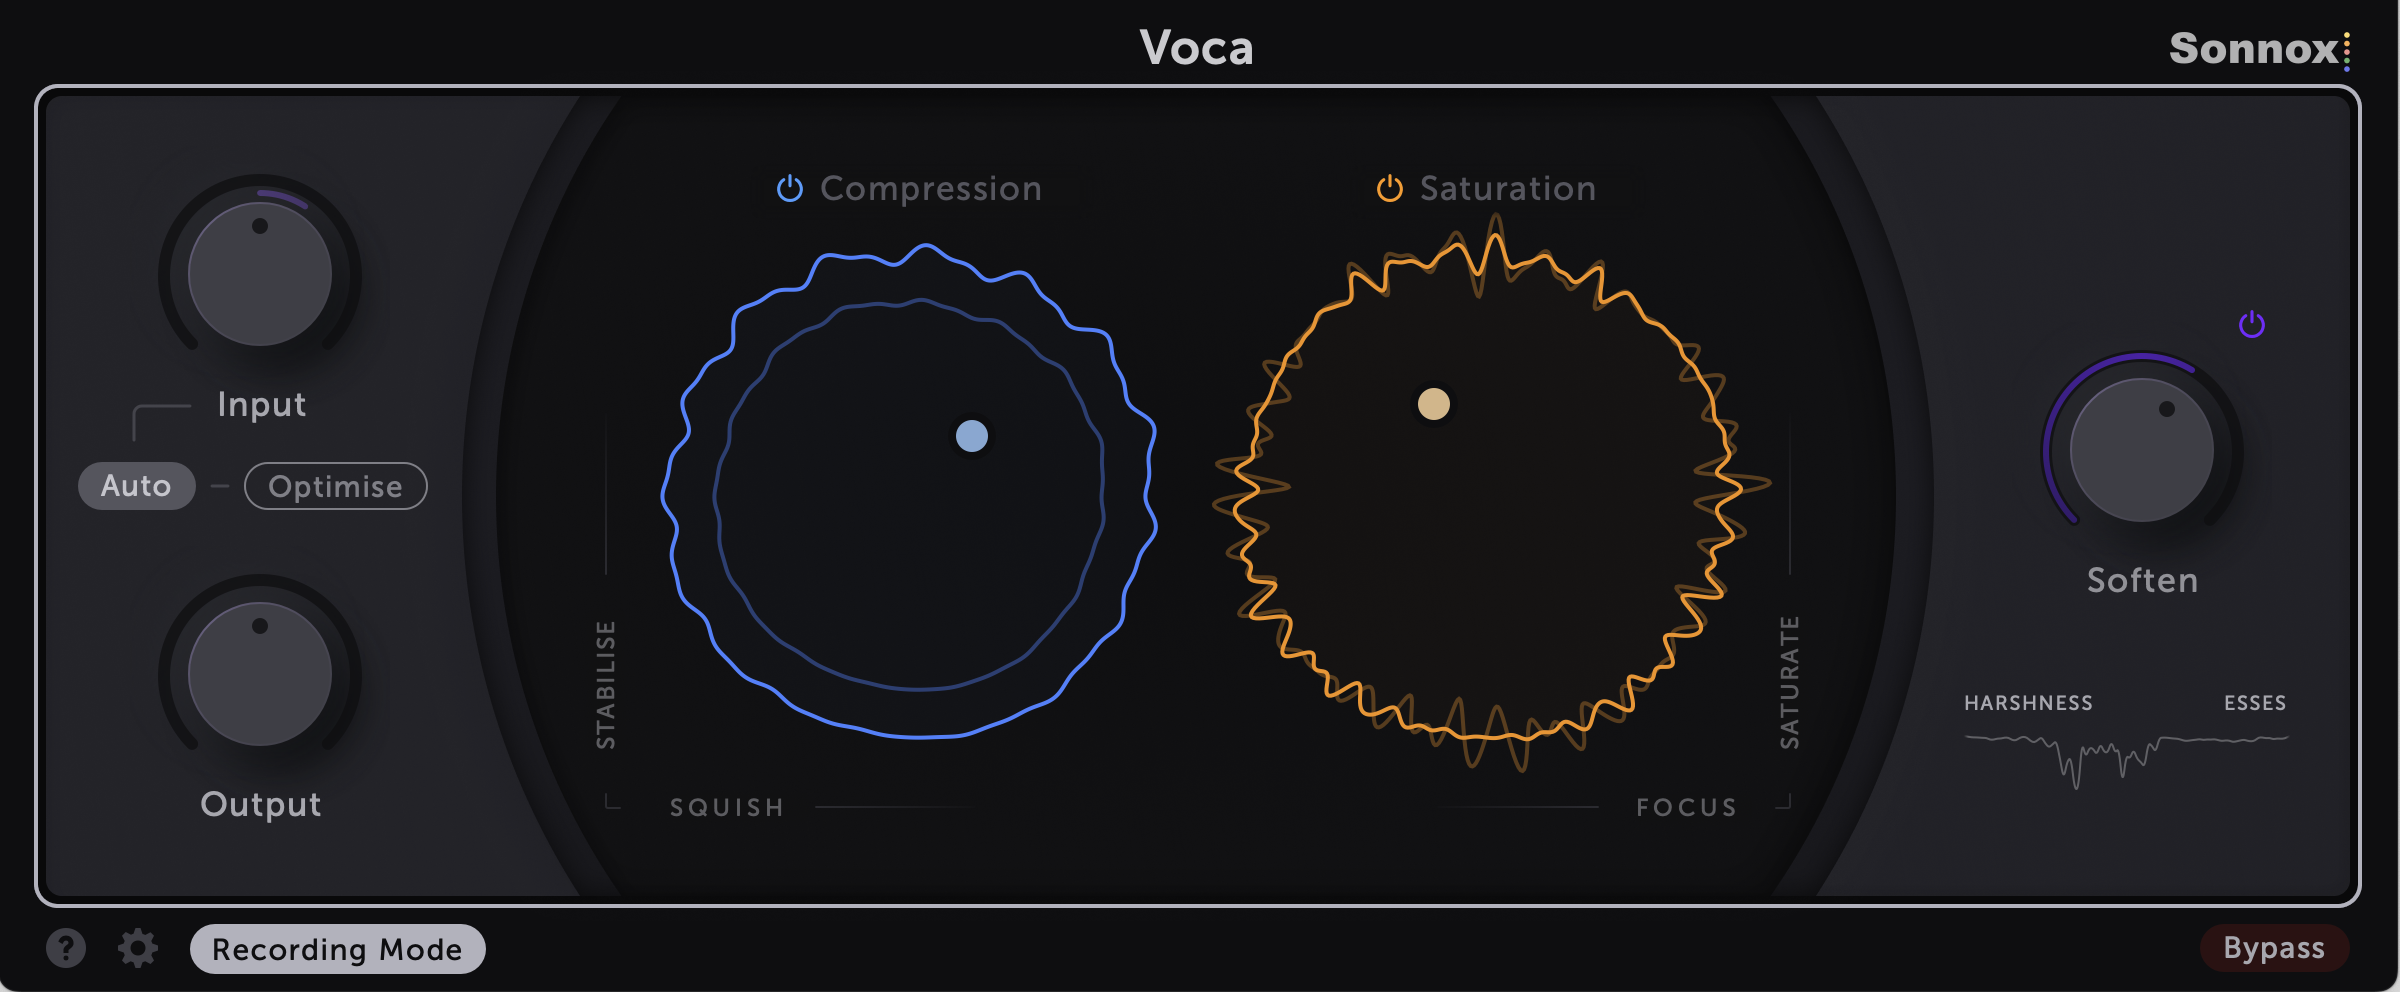
Here is a brief overview of each section:
- Auto Input Volume transparently makes volume across song sections and phrases consistent without requiring you to level out volume manually with pre-effects volume automation or clip gain.
- Compression stabilises dynamics between and within words, enhancing the movement and groove of your vocals and the clarity of consonants.
- Saturation adds density and complexity to your vocals, pushing them back in the mix or pulling them forward, depending on how you focus it.
- Soften reshapes your vocal tone, reducing harshness and sibilance which can cause your vocals to stand out too much on certain words.
Read on for a more detailed look at each section in turn.
Volume
Controls
- Input Volume
- Apply a static volume boost or attenuation before any other processing is applied. Use this if your vocals were recorded too quietly or loudly and need adjusting for a more moderate volume in the mix. Note that changing the Input volume does not affect the behaviour of Auto Input, so the order of use does not matter.
- Auto Input Volume
- Ensure that the volume across phrases and song sections is consistent so that any compression you apply later on has consistent character and movement. The light purple ring on the Input Volume knob shows how much Auto is adjusting the volume. Auto replicates how you might manually draw in pre-effects volume automation or use clip gain in a DAW.
- Optimise
- Click to fine-tune Auto Input Volume to suit your vocals.
- Output Volume
- Apply a static volume boost or attenuation after all other processing stages. All stages of Voca aim to maintain consistent overall loudness, so Output Volume only needs to be adjusted if you need to change the overall volume of your processed vocals and don't want to use your DAW's track fader.
Auto Input Volume
Auto Input achieves consistent volume across phrases and song sections by applying gentle volume boosts and attenuations to pull your vocal volume closer to an internal target level. Clicking Optimise updates this internal target level to suit your vocals.
When your vocal volume is consistent, any compression and saturation you apply later on will have a consistent character throughout the song without digging in too hard on certain words. With Auto Input enabled you no longer need to manually draw pre-effects volume automation in your DAW, allowing you to more easily lift specific sections by automating Voca's output volume or your DAW's track fader.
You no longer need to level out the volume with pre-effects volume automation or clip gain...

...making it easier to do creative section-highlighting fader automation instead!


Optimise
The Optimise button adjusts Auto Input's target level to suit your vocals instead of adjusting your overall vocal volume to match a fixed target. This allows it to improve volume consistency over time without significantly changing the balance of your vocals in the mix.
You won't need to click Optimise in most cases since Auto Input's default target level will be appropriate. However, if you recorded your vocals too quietly or loudly, you may notice that the light purple ring on the Input Volume knob remains stuck at one extreme. This means the target level is inappropriate for your vocals, and Auto Input cannot even out volume inconsistencies.
In such cases, the Optimise button will flash to indicate that you should click it to update the target level to suit your vocals.
Note
Clicking Optimise also adjusts the internal headroom of the compression and saturation sections so that you don't need to readjust them after optimising.
When to disable Auto
You may want to disable Auto in the following cases:
- Your music and vocals are intentionally very dynamic and you want to retain the dynamics of the vocal performance. In this case you can use low Stabilise and Squish settings to gently compress only the louder sections. Alternatively you can automate Stabilise up and down to follow the vocals, resulting in consistent character throughout while retaining the ebb and flow of the performance.
- You want the louder sections of your vocals to sound much more stable than the quiet sections, instead of having consistent movement and character throughout. In this case, you can disable Auto and dial in Stabilise and Squish while listening to a loud section, allowing your vocals to retain their original dynamics during quieter sections.
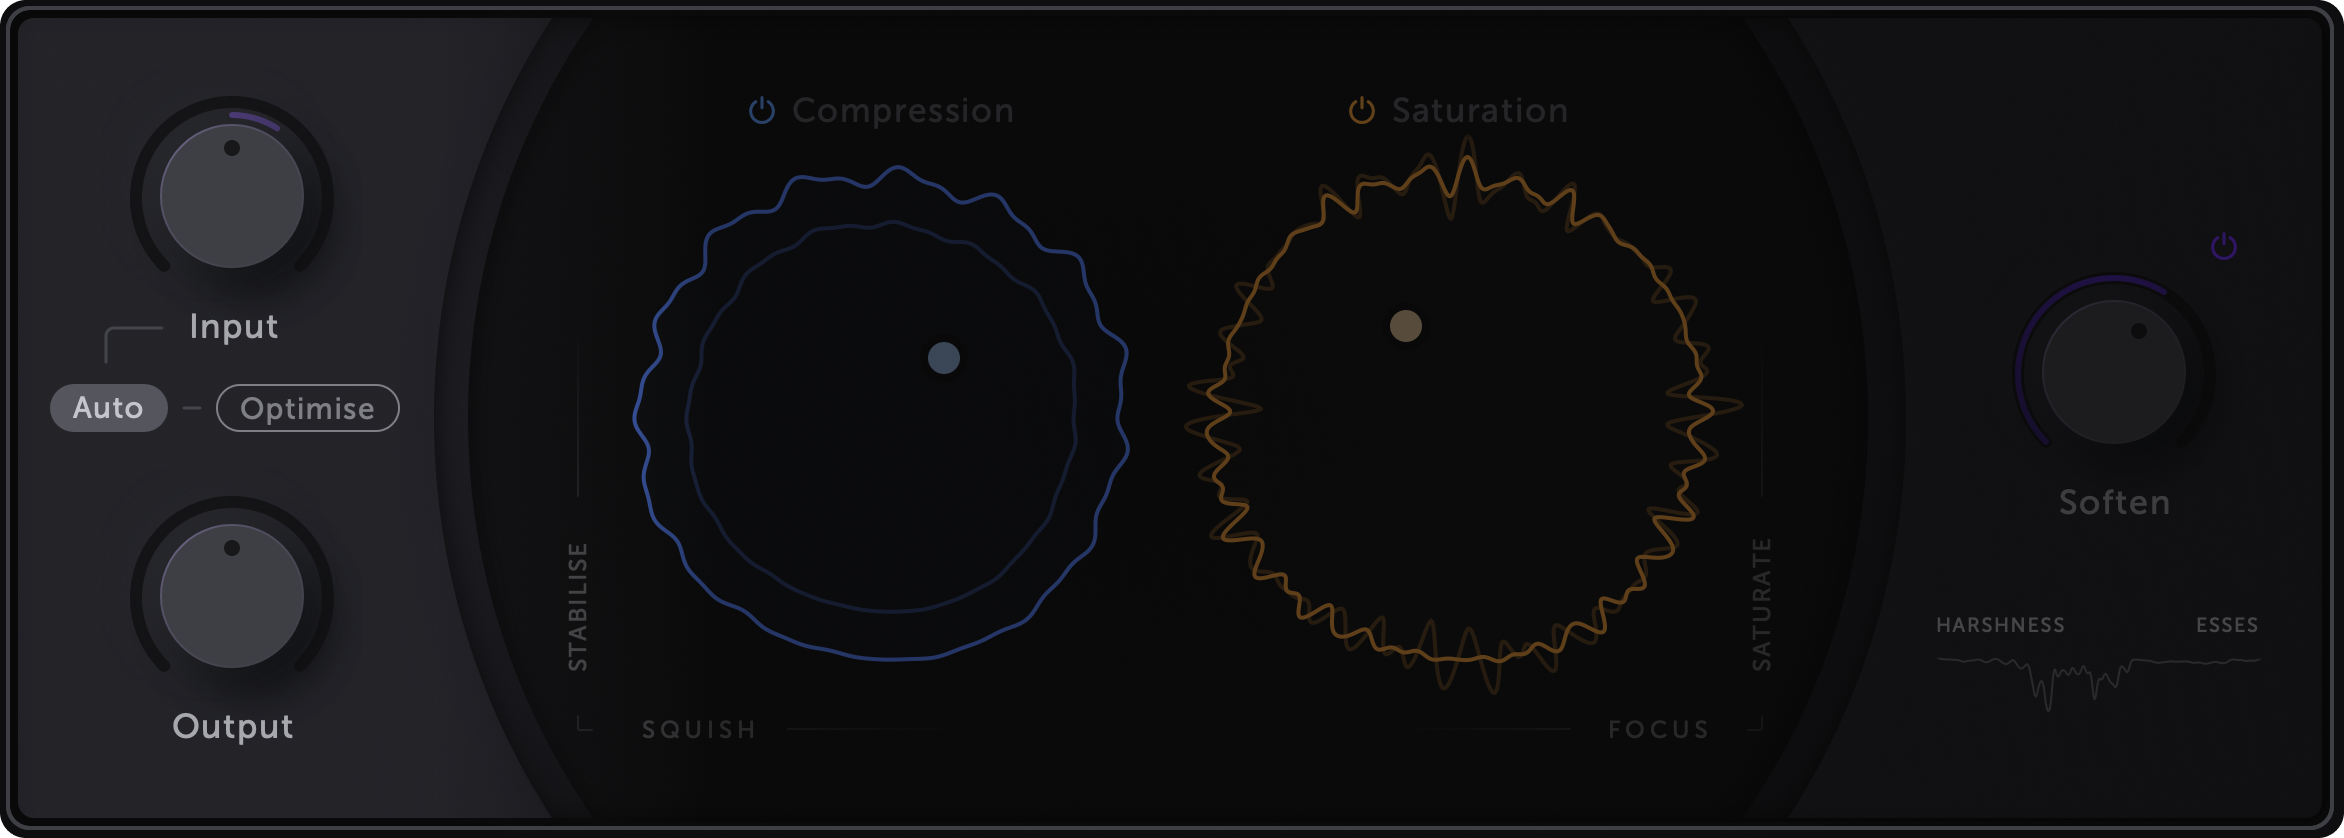
Compression
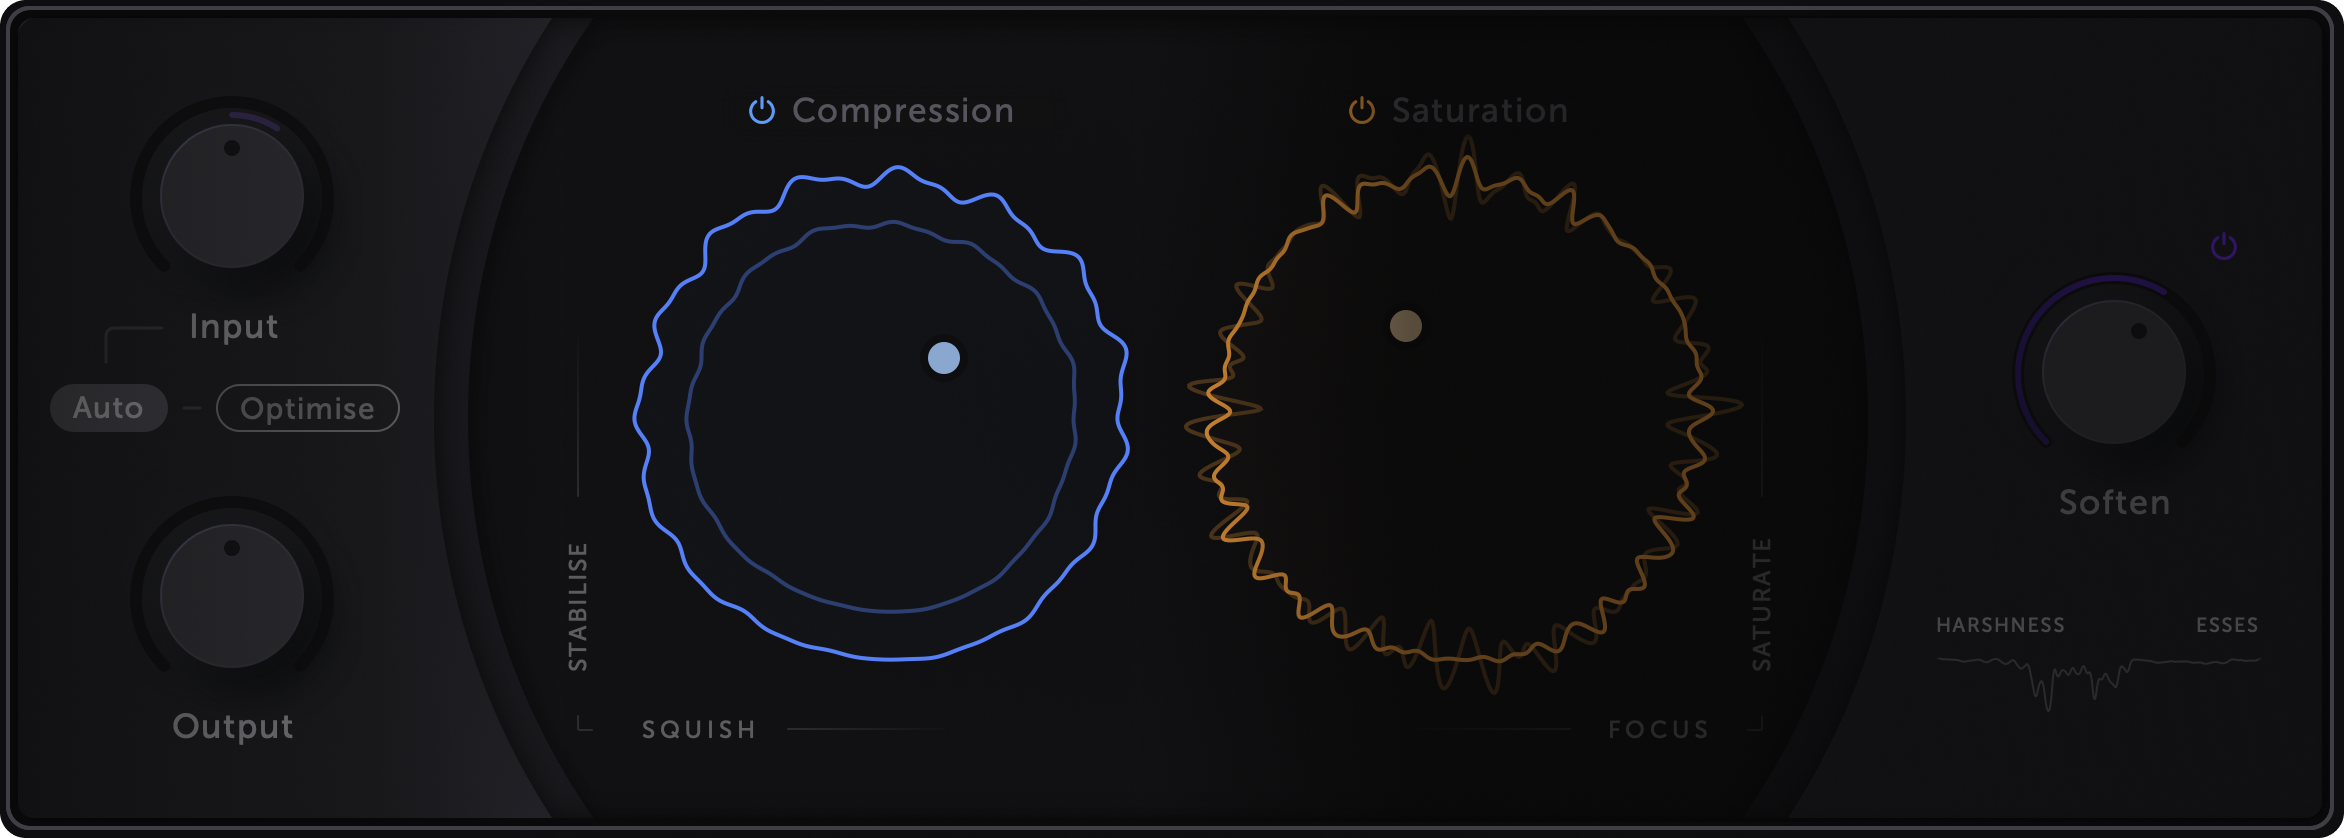
Now that your vocal volume is consistent, you can use compression to Stabilise your vocals in front-back space and to add some character. Simply click and drag in the Compression XY pad.
Controls
- Stabilise
- Drag vertically to adjust how stable your vocals sound by varying the overall amount of compression. Higher Stabilise settings apply more compression.
- Squish
- Drag horizontally to vary the character of your compressed vocals. Higher Squish settings apply faster and more aggressive compression.
Under the hood, the Compression section consists of two compressors, your vocals passing through one after the other. The first compressor responds very quickly to your vocals, and the second responds more slowly. The result is similar to a classic 1176 + LA-2A series combination, though with some twists of our own.
Note
You don't need to know how compressors work to get great results with Voca. If you do want to know more, see Tech Notes.
What to listen for 🎧
To hear how the Stabilise and Squish settings change the character of your vocals, try listening at a soft volume that you could comfortably have a conversation over without soloing the vocals.
Choose a phrase in which the vocal volume surges, such as when the pitch rises and falls quickly. Loop over this phrase and listen to how the voice jumps towards you out of the front of the mix. Start with Stabilise at 0% and gradually drag up while listening to how the voice's front-back position becomes more stable until it's pinned in place. If you aren't used to thinking about a front-back position in a mix, try watching the blue compression meter around the XY pad - its movement matches the stability of your vocals.
Next, with Stabilise at about 50%, drag the Squish control left and right while listening to the consonants in the voice. You'll hear them become softer as you increase Squish and more prominent as you decrease it. Adjust Stabilise and listen to how the consonants become more or less consistent.
As you experiment with different amounts of Stabilise and Squish pay attention to how your vocals move forwards and backwards in the mix, their energy and articulation, the movement between words, and the clarity of consonants.
Tip
Try automating different Squish settings for different song sections. For example, try reducing Squish during loud and dense choruses to help consonants cut through the mix.
Auto gain
When applying compression by reducing a threshold control, as is common with most plugins, the signal tends to become quieter. When applying compression by increasing a compression amount control or an input volume control, as is common on classic analogue compressors, the signal tends to become louder first (one reason why these units can sound better) and then start to become quieter again. When we're mixing, neither is ideal.
When our vocal volume is consistent over time, for example, after using Auto Input, we don't need to use compression to control the overall volume or dynamic range. When mixing, compression excels at shaping movement and energy, evening out the loudness of consonants, sibilance, and the body of each word so that our vocals are consistently intelligible.
However, finding the sweet spot can be challenging when every change of a compressor's control changes the overall volume. Voca compensates automatically, allowing you to freely explore Stabilise and Squish settings while listening for the vocal character that fits your mix without worrying about changes to your vocal balance.
Saturation
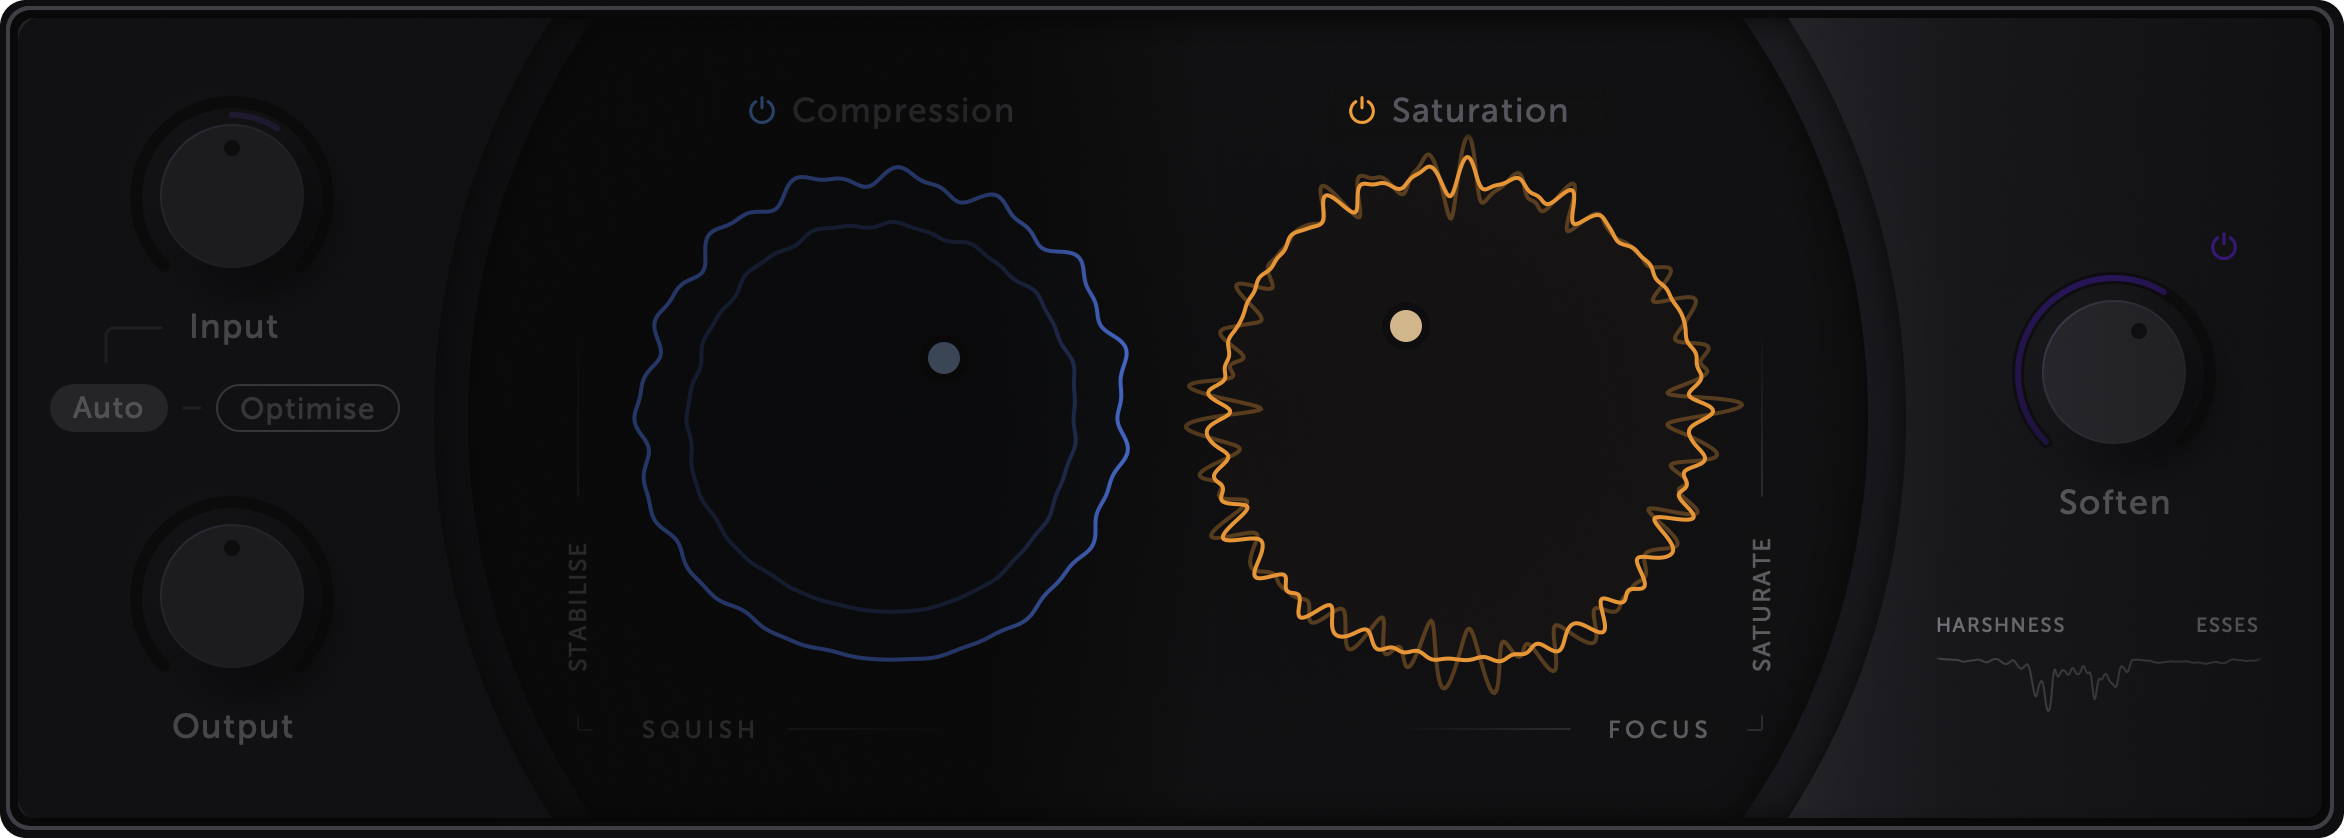
Many saturation tools provide control over the overall amount of saturation but require selecting different modes or adjusting a complex equaliser to change the character of the saturation. The character of Voca's saturation is continuously variable via the Focus control.
Controls
- Saturate
- Drag vertically to Saturate your vocals. Higher Saturate settings sound more dense, complex, and rich and can help glue vocals into a mix with other saturated elements.
- Focus
- Drag horizontally to re-Focus your vocals in the mix. Lower Focus settings (left) add warmth and reduce definition, pushing them backwards. Higher Focus settings (right) add definition and air, pulling them forward.
What to listen for 🎧
To hear how the Saturate and Focus settings change the character of your vocals, start by listening at a moderately loud volume with the vocals soloed.
Dial in Stabilise and Squish, then move across to the Saturation XY pad. Drag up to increase Saturate, listening to how consonants become brighter and the body of each word starts to sound richer and more complex. Now drag left and right to adjust Focus, listening to how the tone changes - warmer, more dense, less defined with low Focus settings, and brighter, more airy, more defined with high Focus settings.
Unsolo the vocals and continue varying Saturate and Focus, listening to how lower Focus settings push your vocals deeper into the mix. In comparison, higher Focus settings pull them forward in front of the rest of the mix.
Tip
To add energy and urgency, try reducing Stabilise so that louder words hit the saturation section harder and sound more distorted than the rest of the vocals.
Soften
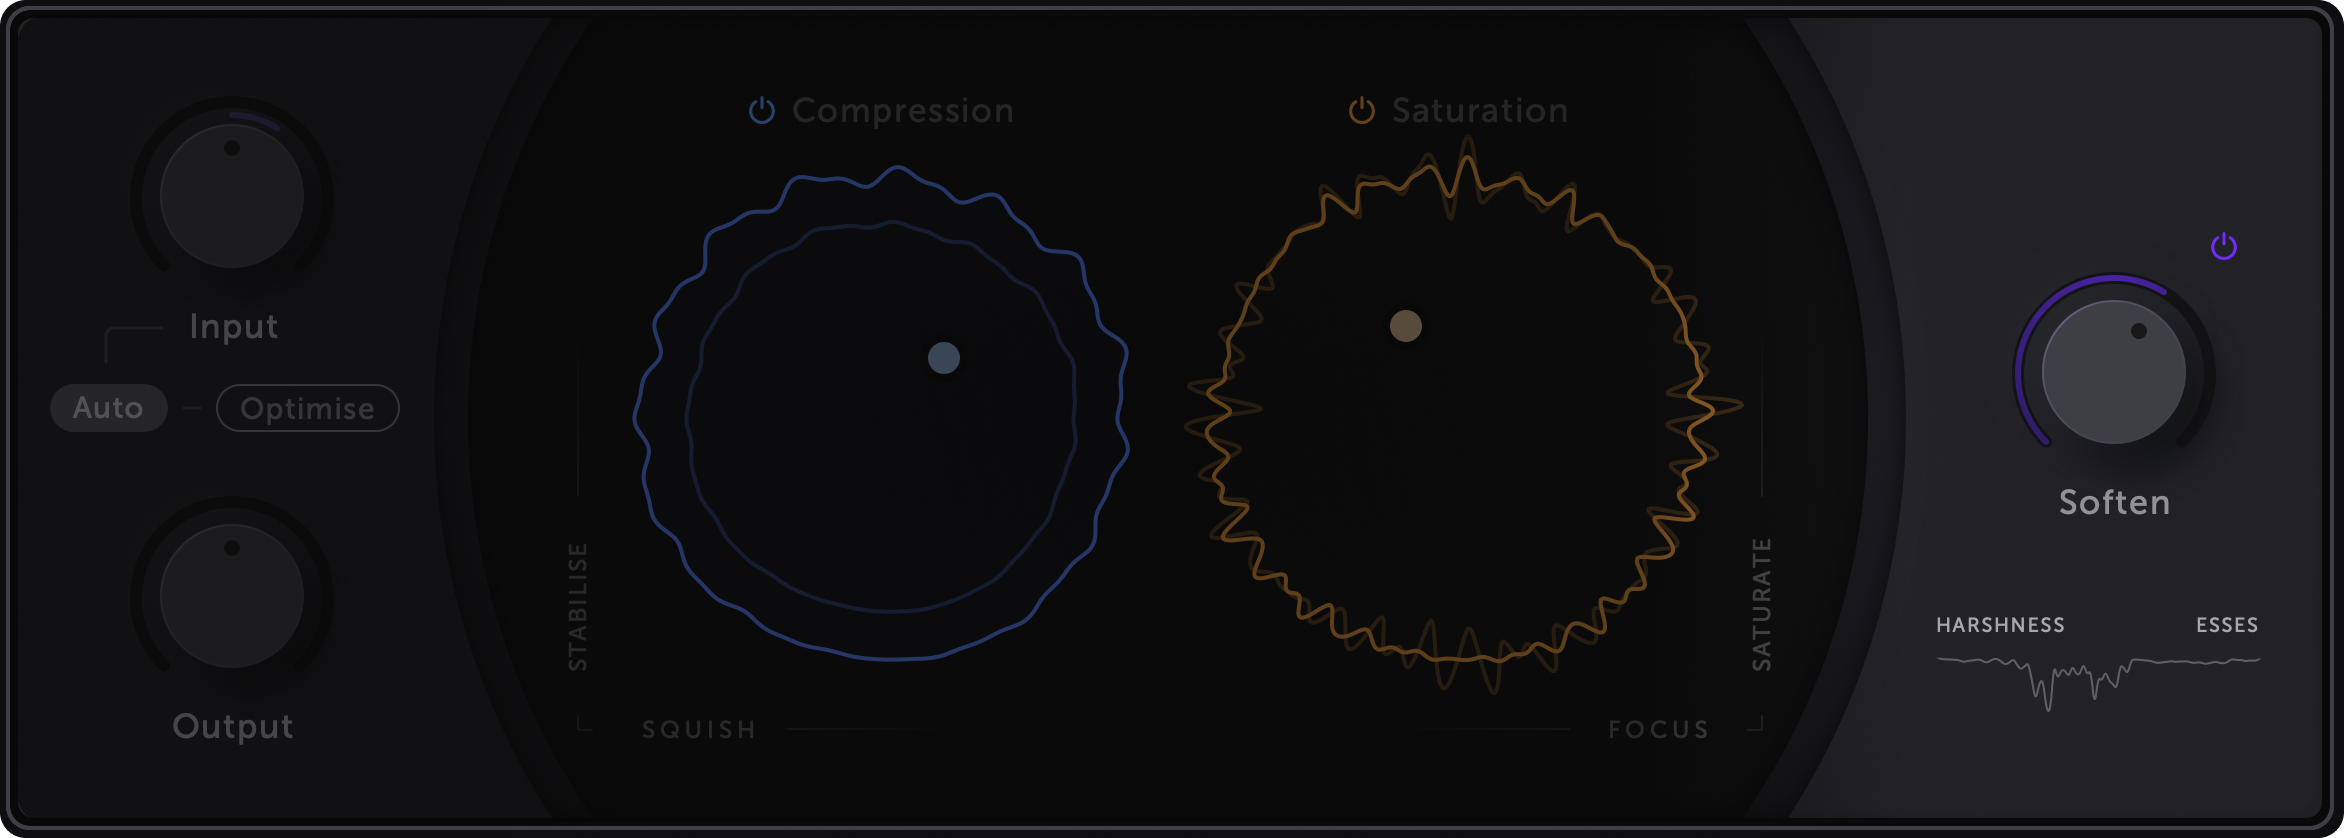
After applying compression and saturation, you might still hear certain words, or parts of words, poking out of the front of your mix - harshness on specific vowels, loud sibilance, a hardness that calls too much attention to the vocals.
Simply increase the Soften knob to reduce such harsh characteristics dynamically.
What to listen for 🎧
To hear how Soften reshapes your vocal tone, try listening at a quiet volume without soloing the vocals.
Loop over a phrase in which you hear some harshness and sibilance. Start by disabling the Soften section's power button ⏻ and setting the Soften knob to 50%. Close your eyes or look away from the screen and focus on a different element of your mix.
Press play and notice how momentary harshness and sibilance pulls your attention back to the vocals. Continue listening while toggling Soften's power button on and off. Listen for consistency of tone rather than volume and how Soften smooths over the harshness and sibilance without making your vocals sound dull.
If you aren't sure you're hearing how Soften changes the sound, try using a higher setting while watching the meter below the Soften knob.
Note
If your vocals don't sound harsh, you'll need to set the Soften control at maximum to hear any change in sound. On some vocals, even a maximum setting will result in little or no change. This is by design.
Unlike a dynamic equaliser, the harshness and sibilance reduction is based on the spectrum's shape, rather than on the signal level in a specific narrow band. Therefore, Soften doesn't need a threshold adjustment when the signal level changes, and won't dig in too hard if you were to disable Auto Input or manually adjust the Input Volume.
It's calibrated to prevent overprocessing that would dull or deaden certain words, since that would create the opposite of the problem it aims to fix.
Recording Mode
When recording vocals, it's common to use the "direct monitoring" mode of your audio interface to hear the microphone input routed directly to your headphones without going through your computer since this minimises the delay you hear in your headphones. However, it can be challenging to deliver your best performance when you can't hear how your vocals will sound with effects like compression, tone shaping, and reverb in the final mix. To monitor through your computer, DAW, and plugins, you need to avoid adding additional delay to your vocals.
Some plugins, including Voca, introduce some delay (often called latency) to achieve the best sound quality. Latency can make it difficult to sing on the beat, throwing off your timing and pitch.
Enabling Recording Mode reduces Voca's delay to zero, so it doesn't interfere with your performance. Now, you can hear how your vocals sound through Voca in realtime, without distracting delays.
The trade-off is that with Recording Mode enabled, Voca's compression and saturation sound a little less smooth. It still sounds great, though, and the difference is subtle enough that it won't interfere with your vocal performance. See Tech Notes for more details.